Setup
Activate the device.
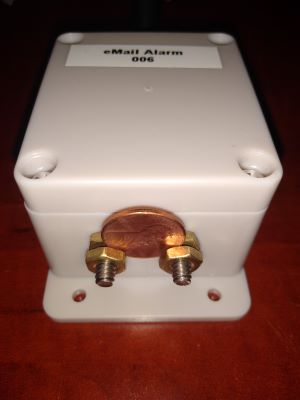
The preferred method is to connect the device to the actual floating switch, and then activate the switch.
Alternatively, you can connect the two terminals together with a piece of wire or a penny.
Do this close to the final working position to ensure that you have a good wifi connection.
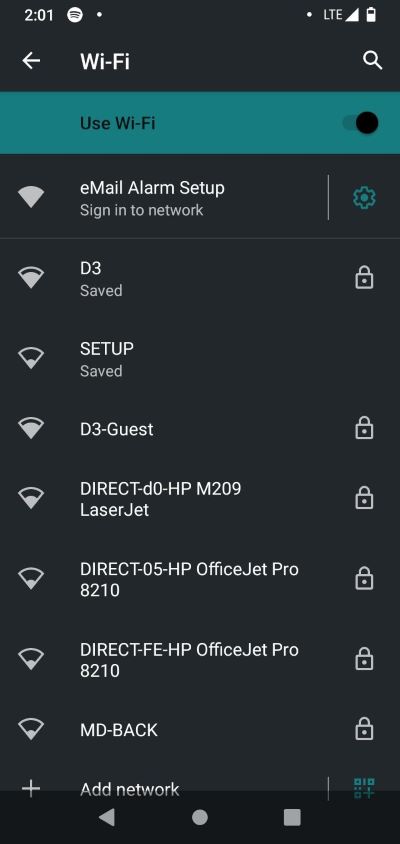
Connect with phone.
Use the phone to connect to the eMail Alarm Setup access point. Depending on the type of phone, you might need to go to More Settings to be able to connect with the access point.
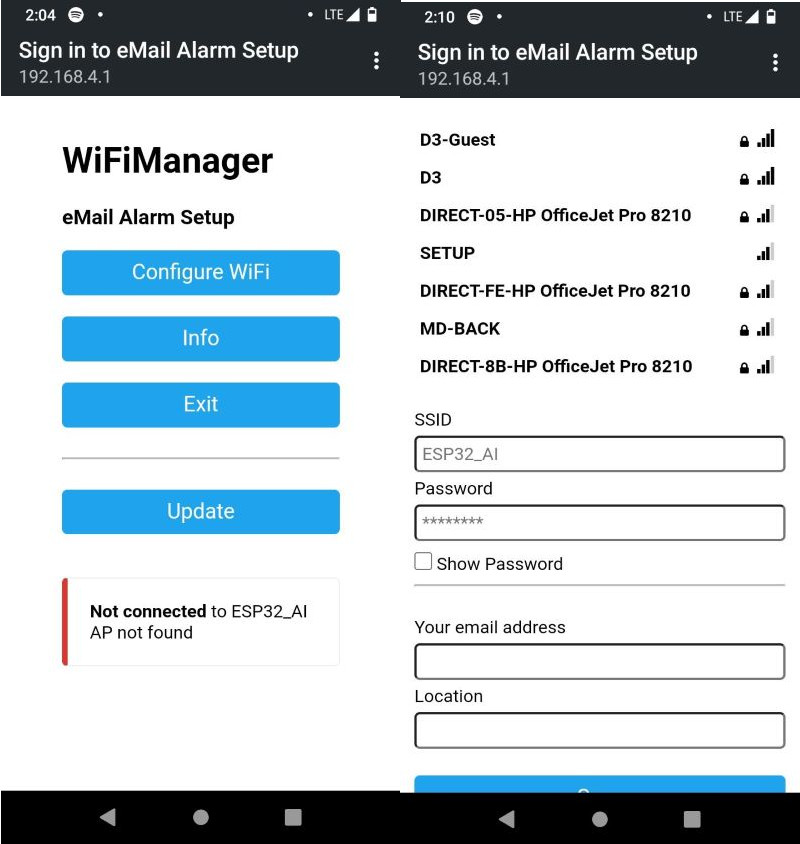
Use the WiFi Manager and enter credentials
Inside the wifi Manger click on Configure WiFi. Wait a couple of seconds for the device to scan for the available wifi connections. You might need to refresh the page or hit the Configure WiFi button again.
Choose the wifi network and then provide the password.
Provide the email address where you want to receive your alerts and then the location of the sensor. If you have more than one device this will come in handy :) There should only be one email address in this field. Multiple email addresses are not supported.
Alarm eMail incoming
If everything was entered correctly you will receive and email alert within 20 seconds.
Factory reset
When something goes wrong or you want to setup the device to different settings follow these steps.
- Turn off your wifi or disconnect the device antenna. You need to be far enough from your wifi so that there is no signal detected.
- Turn on the device. If there is no wifi signal found the device will create an access point after about 20 seconds.
- Wait 30 seconds and then turn on your wifi or attach the antenna to the device.
- You should see the access point created 'eMail Alarm Setup' on your phone and continue setting up the device per the setup instructions.